Lanterns
Summary
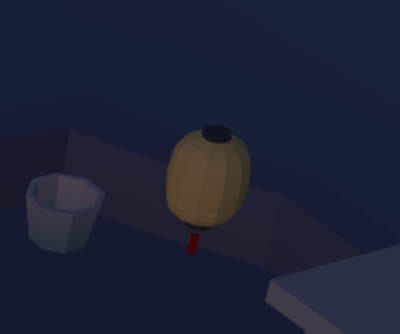
The lanterns in my game have a few different components. In this section, I'll be going over the mesh itself, texture swapping, collisions, and lights.
Lantern Mesh
The lanterns are duplicates of a single mesh. If a mesh is interactable, it's best to clone it as often as possible if you're going to be using multiple instances. I followed the Demystifying Animation Groups to learn how to clone the meshes.
In _loadAsset, after we've imported our environment, we'll want to also import our single lantern mesh.
//loads lantern meshconst res = await SceneLoader.ImportMeshAsync("", "./models/", "lantern.glb", this._scene);
Then, we extract the mesh from the root, and remove the root. The coordinate system guide for 3DMax explains why we have this root node when we import the glTF. Since we want to clone just the mesh, we'll need to remove the root.
//extract the actual lantern mesh from the root of the mesh that's imported, dispose of the rootlet lantern = res.meshes[0].getChildren()[0];lantern.parent = null;res.meshes[0].dispose();
Then we add this to the object we're returning to the load function.
return {//..envrionment mesheslantern: lantern as Mesh,}
Creating Lanterns
Once we've gotten the result of our import (assets), the load function is in charge of setting up all of the lanterns in the scene.
assets.lantern.isVisible = false; //original mesh is not visible//transform node to hold all lanternsconst lanternHolder = new TransformNode("lanternHolder", this._scene);
From our assets, we want to make our lantern invisible. This original mesh's only purpose is to be cloned to create our other meshes. Then we want to create a transform node to hold all of our lanterns. I did this just to have them organized together. It makes navigating through the inspector a lot easier when trying to debug.
Then we loop through however many lanterns we want to create, for the game I made 22 lanterns. For each pass through the for loop, we want to:
- Create a clone of our mesh, set it to visible, and then add it to our transform node.
//Mesh Cloninglet lanternInstance = assets.lantern.clone("lantern" + i); //bring in imported lantern mesh & make cloneslanternInstance.isVisible = true;lanternInstance.setParent(lanternHolder);
- Create our lantern and add it to our array of lantern objects.
//Create the new lantern objectlet newLantern = new Lantern(this._lightmtl,lanternInstance,this._scene,assets.env.getChildTransformNodes(false).find((m) => m.name === "lantern " + i).getAbsolutePosition(),animGroupClone,);this._lanternObjs.push(newLantern);
_lanternObjects should be instantiated as an empty array in the environment constructor.
Once we've gone through and created all of our lanterns, we can dispose of the original lantern mesh
assets.lantern.dispose();
Lantern Class
So, what exactly does creating a new lantern do? I've created a Lantern class in lantern.ts. This will store the information for each lantern instance.
In order to create a lantern, we need:
- The material we're going to swap to when lit
- A mesh
- The scene it belongs to
- A position
In the constructor of our lantern, we want to set all of these up.
constructor(lightmtl: PBRMetallicRoughnessMaterial, mesh: Mesh, scene: Scene, position: Vector3, animationGroups?: AnimationGroup) {this._scene = scene;this._lightmtl = lightmtl;//create the lantern's sphere of illuminationconst lightSphere = Mesh.CreateSphere("illum", 4, 20, this._scene);lightSphere.scaling.y = 2;lightSphere.setAbsolutePosition(position);lightSphere.parent = this.mesh;lightSphere.isVisible = false;lightSphere.isPickable = false;this._lightSphere = lightSphere;//load the lantern meshthis._loadLantern(mesh, position);}
- lightSphere is an invisible mesh that will be used later to calculate what meshes are affected by the lantern's light.
- _loadLantern takes care of setting the mesh and position of our lantern. We need to set the absolute position instead of local position because this is an imported glTF.
this.mesh = mesh;this.mesh.scaling = new Vector3(0.8, 0.8, 0.8);this.mesh.setAbsolutePosition(position);this.mesh.isPickable = false;
I didn't want the player to be able to jump on the lantern, so I set isPickable to false (default is true). And since I didnt want the player to collide(physically) with the lantern, I kept checkCollisions to false (which is the default value). This way, the player can easily navigate through lanterns while still having a way to check that we've intersected with them.
Collisions
The final setup part of our lanterns is calling checkLanterns in _initializeGameAsync.
The first thing we'll need to do is set up an actionManager inside of the Player Constructor
//--COLLISIONS--this.mesh.actionManager = new ActionManager(this.scene);
This function has 2 main purposes:
- Light the first lantern. It's pre-lit to allow the player to not get stuck if they haven't found the next lantern in time. They can return to this lantern to re-light their sparkler.
if (!this._lanternObjs[0].isLit) {this._lanternObjs[0].setEmissiveTexture();}
- Set up the intersection triggers for each lantern with the player. Using
ActionManger.OnIntersectionEnterTrigger, we're watching for 1 of 2 things when the player intersects with a lantern:- The lantern is unlit and he player sparkler is lit:
//if the lantern is not lit, light it up & reset sparkler timerif (!lantern.isLit && player.sparkLit) {player.lanternsLit += 1; //increment the lantern countlantern.setEmissiveTexture(); //"light up" the lantern//reset the sparklerplayer.sparkReset = true;player.sparkLit = true;}- The lantern is already lit:
//if the lantern is lit already, reset the sparklerelse if (lantern.isLit) {player.sparkReset = true;player.sparkLit = true;}
Setting Emissive Texture
The _setEmissiveTexture function handles everything that's involved in "lighting" the lantern.
- We need to know that the lantern is now lit.
this.isLit = true;
- Swap the texture to make the lantern visually look like it's been lit.
this.mesh.material = this._lightmtl;
Texture Swapping
This is a super simple process that involves making a material that has a texture of what the lantern looks like when "lit".

I generated this texture in blender, just giving the mesh an emissive coloring and then baking that into a .png.
//create emissive material for when lantern is litconst lightmtl = new PBRMetallicRoughnessMaterial("lantern mesh light", this._scene);lightmtl.emissiveTexture = new Texture("/textures/litLantern.png", this._scene, true, false);lightmtl.emissiveColor = new Color3(0.8784313725490196, 0.7568627450980392, 0.6235294117647059);this._lightmtl = lightmtl;
This texture is then used to make a new material that we'll be swapping once _setEmissiveTexture is called. This material is created in the Environment constructor, then passed into the lantern constructor.
Here is we create a new folder for textures in the public folder.
- Dynamically create a point light where the lantern is in order to light up the surroundings.
const light = new PointLight("lantern light", this.mesh.getAbsolutePosition(), this._scene);light.intensity = 30;light.radius = 2;light.diffuse = new Color3(0.45, 0.56, 0.8);this._findNearestMeshes(light);
Multiple Lights
The most important part of this is the fact that there is a default cap on the number of lights a material can have. This is for performance reasons. If you have a ton of lights, it'll slow everything down. However, it's possible to get good performance if we use small lights and limit the amount of meshes the light affects. This is what _findNearestMeshes does.
this._scene.getMeshByName("__root__").getChildMeshes().forEach((m) => {if (this._lightSphere.intersectsMesh(m)) {light.includedOnlyMeshes.push(m);}});//get rid of the spherethis._lightSphere.dispose();
This goes through the entire scene, looks for what the lightSphere intersects with and pushes those meshes to the list of what our light affects. I was able to achieve this by referring to what was done in this
Note: the implementation for the lights here is what I had before making adjustments during the performance phase. If you'd like to see the final version, take a look at the performance section.
Now, when you run the game and collide with the lanterns, you should see their materials change (except the first one since that one is pre-lit)!
Resources
Files Used:
Follow Along: