Basic WebVR
WebVR is deprecated and was removed from most (if not all) modern browsers. it is strongly recommended that projects use the WebXR experience helper instead of WebVR. For more information, check out our introduction to WebXR.
We leave this information since the code, apart from the direct interface to WebVR, can be used in other projects.
A simple WebVR gamelet to show how to implement key VR features.
The Design
Overview
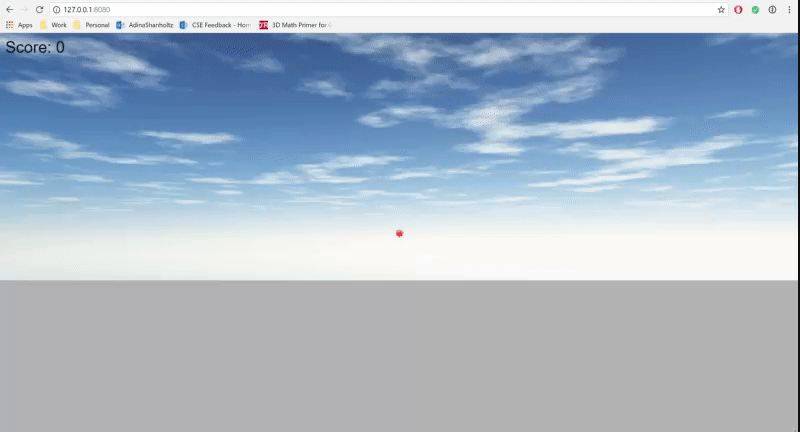
The scene is very simple. The pickable object is steadily rotating around you. When clicked, it'll make a spatial sound effect and your score will increase. There is a reticle in the middle of the screen that changes color when something can be picked.
This scene shows:
- Creating a simple reticle
- Dynamic GUI
- VR Camera
- Spatial Sound
Reticle
There are a number of different ways to create VR reticles. An ideal reticle would have animations that would give the user feedback on their environment and the different actions they can perform. For this gamelet, we kept it simple and used a sphere mesh that changed color to indicate something pickable.
The sphere reticle starts red, and changes to green when pickable. We don't want our reticle to be pickable since we're not interacting with it directly.
/*Sphere reticle*/var reticle = BABYLON.Mesh.CreateSphere("reticle", 10, 0.03, scene);var retmat = new BABYLON.StandardMaterial("reticalmaterial", scene);retmat.emissiveColor = BABYLON.Color3.Red();retmat.specularColor = BABYLON.Color3.Black();reticle.material = retmat;reticle.isPickable = false;reticle.position.z = 2;
The secret behind creating a reticle is Raycasting. A Ray is a straight line that'll tell us when it intersects with an object. We want to create a Ray from the middle of our camera facing forward, and change the color of the reticle to green when we can interact with the mesh.
We put the funciton in registerBeforeRender() so that it gets continually updated every frame.
/*The function that runs to determine the behavior of the reticle.*/function castRay() {var ray = camera.getForwardRay();var hit = scene.pickWithRay(ray);if (hit.pickedMesh) {reticle.material.emissiveColor = BABYLON.Color3.Green();} else {reticle.material.emissiveColor = BABYLON.Color3.Red();}}scene.registerBeforeRender(function () {castRay();});
In order for the reticle to move with the VR Camera as well as the Web camera, we have to change the reticle's parent whenever we enter VR mode.
VRHelper.onEnteringVR = function () {console.log(VRHelper.currentVRCamera);reticle.parent = VRHelper.currentVRCamera;};VRHelper.onExitingVR = function () {reticle.parent = camera;};
Ways To Improve
You could improve this reticle a number of ways. As mentioned previously, providing better feedback to the user with interactable options is one of the key factors in making an effective reticle. Additionally, a 2D reticle that rotates with the surface of what the user is looking at gives a more concrete picture of where the user is looking in 3D space.
Dynamic GUI
In the context of our game, our GUI consists of a Score variable that increases every time the user clicks the rotating box. To do this, we have a scoreVar object with a 'score' attribute that gets incremented with the action below. Follow these guides for more about GUI and Actions.
/*Object keeping track of score. It's an object and not an int because of the available actions. */var scoreVar = { score: 0 };/*GUI*/var advancedTexture = BABYLON.GUI.AdvancedDynamicTexture.CreateFullscreenUI("UI");var scoreText = new BABYLON.GUI.TextBlock();scoreText.text = "Score: " + scoreVar.score.toString();scoreText.color = "black";scoreText.fontSize = 30;scoreText.paddingTop = 10;scoreText.paddingLeft = 10;advancedTexture.addControl(scoreText);scoreText.textHorizontalAlignment = BABYLON.GUI.Control.HORIZONTAL_ALIGNMENT_LEFT;scoreText.textVerticalAlignment = BABYLON.GUI.Control.VERTICAL_ALIGNMENT_TOP;/*Actions that'll happen when clicking (or "picking")*/blubox.actionManager.registerAction(new BABYLON.IncrementValueAction(BABYLON.ActionManager.OnPickTrigger, scoreVar, "score", 1));
VR Cameras
Babylon.js makes it very easy to use VR camera. Our scene has two options. The default impelmented is the WebVRFreeCamera, the documentation, including browser/device limitations and motion controls, can be found here.
var camera = new BABYLON.WebVRFreeCamera("Camera", new BABYLON.Vector3(0, 1, 0), scene);camera.attachControl(canvas, true);
Alternatively, you can include scene.createDefaultVRExperience(); to toggle between VR capable scenes. In the playground code, comment out the lines that use the camera var and uncomment the lines that have //to use with createDefaultVRExperience().
Spatial Sound
Spatializing a sound in Babylon.js can be as simple as marking the BABYLON.Sound spatialSound attribute as 'true'. However, there are a number of other options you can specify, including linear, inverse, or exponential distance, max distance, and the panning model.
A more in depth guide can be found here.
Afterwards, we make sure to attach the sound to our moving box, and register the sound to play when the box is clicked.
Note: Whenever you attach a sound to a mesh it automatically converts it into a spatial sound.
/*Spatial Sound Effect*/var SFX = new BABYLON.Sound("gunshot", "sounds/gunshot.wav", scene, null, { maxDistance: 50, loop: false, autoplay: false, spatialSound: true }); //no need to set spatialSound if attaching to a meshSFX.attachToMesh(blubox);blubox.actionManager.registerAction(new BABYLON.PlaySoundAction(BABYLON.ActionManager.OnPickTrigger, SFX));
The Finished Game
The full code, featuring the sections mentioned above and including the rest of the game scene, can be found below.